Showing posts with label nifty things. Show all posts

Sunday, June 7, 2015

3 smartest kitchen products

Hi everyone! It has been a really long time since my last post, and a lot has happened! I finished grad school and got my PhD, and now I'm on an extended break before I start work next month.

A good friend of mine made a request for this post, and I was really inspired by her idea. I picked 3 of my favorite kitchen products that were not super obvious. (For example, everyone already knows a good food processor, sharp knife, and stand mixer are great to have.)


Also a note - as stated in my disclosures page, I do receive a small commission from Amazon if you click on these product links and end up purchasing the product. I would highly recommend these products for any friend regardless of the commission.

Let's start the countdown!

3. Chef's Planet Glass Cruets, available in 30, 16, 8, and 5 ounce sizes.


I love this because the funnel is built-in; for our other oil or vinegar bottles I have to dirty a funnel to fill it, and then put it in the dishwasher, and the dispenser drips or gets gunky quickly (I know, life is really tough). This spout works perfectly, and I honestly don't know if it drips because the funnel thing will catch it if it does. Far superior to any other dispenser I've tried.

Sizes:
30 ounce (the link above): very generously sized, good for oft-used cooking oil.
16 ounce: I don't have this one, but good for cooking oil if you have very limited counter space and don't cook every day.
8 ounce: we use ours for extra virgin olive oil, which we don't run through quickly. I sprayed the bottom with mirror finish spray paint to protect the delicious sensitive compounds from sunlight.
5 ounce: given how small the 8 ounce is, I don't foresee a need for this guy; it only holds a little over half a cup.

Cons: They are a bit pricey, and I kinda wish the glass were a little bit thicker just for peace of mind, though I've never had either of mine crack on me. But most of all, I also wish they made them with square bases with straight sides, so that I could line them up more neatly and they would take up less counter space. (Manufacturer, can you hear me??)

2. Microfiber Cleaning Cloths


Do the math: our household of 2 humans and 2 dogs used to consume a big pack of paper towels from from Costco 2-3 times a year, which means we probably spent roughly $50 on paper towels a year.  Since we've bought these cleaning cloths, I think paper towel consumption has decreased at least a third, so they paid for themselves in less than a year. It's a cheaper and greener way to clean, and they're also good for dusting computers and TVs. Since they're amazingly absorbent, they clean up spills really quickly. Plus the 3 colors are really helpful; we use green in the kitchen/eating areas, blue in the bathroom, and yellow for other furniture and outdoors. I've been washing them with bleach to help sanitize, and they haven't suffered from that even after 2 years of use.

Nitpick cons: the way the fabric has loops often catches debris like dry leaves or little twigs. This is actually good thing for cleanup, but then they're also hard to shake off, though most debris comes off in the wash. Also, if you have an apartment or smaller home, a 48 pack will be pretty excessive, so I recommend splitting with 1 or 2 friends.

1. Cuisinox Drink Markers


My set wasn't ordered from Amazon but rather a great find at a restaurant supply store in Singapore, but based on the shape and colors I'm pretty sure this product is identical to what I have.
You can use them on the stem as pictured on the product page, but the amazing is: you can also put the slit into the rim of any glass. Which makes them infinitely better than your standard wine charms and so great for company. I've seen similar products that have suction cups to stick to the outside of the glass, but reviews for those say they fall off easily and don't stick to plastic cups.

At least one of my friends has been looking for something similar for a long time, and I'm really excited I finally found it!


So there you have it, three wonderful kitchen products that I wish I had started using earlier. I guess in a way, having dogs is also a good kitchen tool too, because they vacuum up food crumbs.  See how clean my floors are?!


 Follow

Friday, May 8, 2015

Best way to store receipts


Yes, I believe in monsters. I used to have a receipt monster that haunted me, and I went through a couple of different systems (if you could call them that) which didn't work until I finally found one that wrangled my receipt monster!

First, let me clarify: I only keep receipts in case I need to return something later. In my opinion, there's not really any point to keeping receipts for things I'll never return, like groceries, produce, gas, etc. For important purchases of big-ticket items (appliances, electronics, etc.), I attach the receipt to the product manual, warranty info, etc. all together in the filing cabinet. (More on that in a future post, perhaps.)

So, here's what I had tried in the past...
Shoebox: yeah right. Let's not even go there.
A single receipt file in a filing cabinet: receipts fell out all the time, were hard to find when I needed them again, and just got too disorderly. They also just accumulated forever until the next time I moved homes, when I'd just toss out all the contents of the file.

Then I got this mini expanding file folder from the Container Store a few years ago, and I love it! The new system is:
  • File the receipt away in the month that you made the purchase.
  • At the beginning of every month, flip through that month's receipts from the previous year, and toss them out.
It's easy enough that the hubby happily complies! No more random receipts lying around the house. If you're not near a Container Store, here's a similar (dare I say cuter) one from amazon:

That's all for today, folks! Starting the 2 week countdown today until my last day as a grad student. The little monsters will be happy to have me home all day every day when I take a break after that, but for now they're doing a lot of this:


Follow

Monday, March 30, 2015

Spring cleaning: light switches!


Happy Monday, guys!  (If there is such a thing...)

I got some great spring cleaning done this weekend, including cleaning up some light switches! If you live in an older home like me, these are some of the little details that get easily overlooked, but can really brighten up your house if you deal with them.

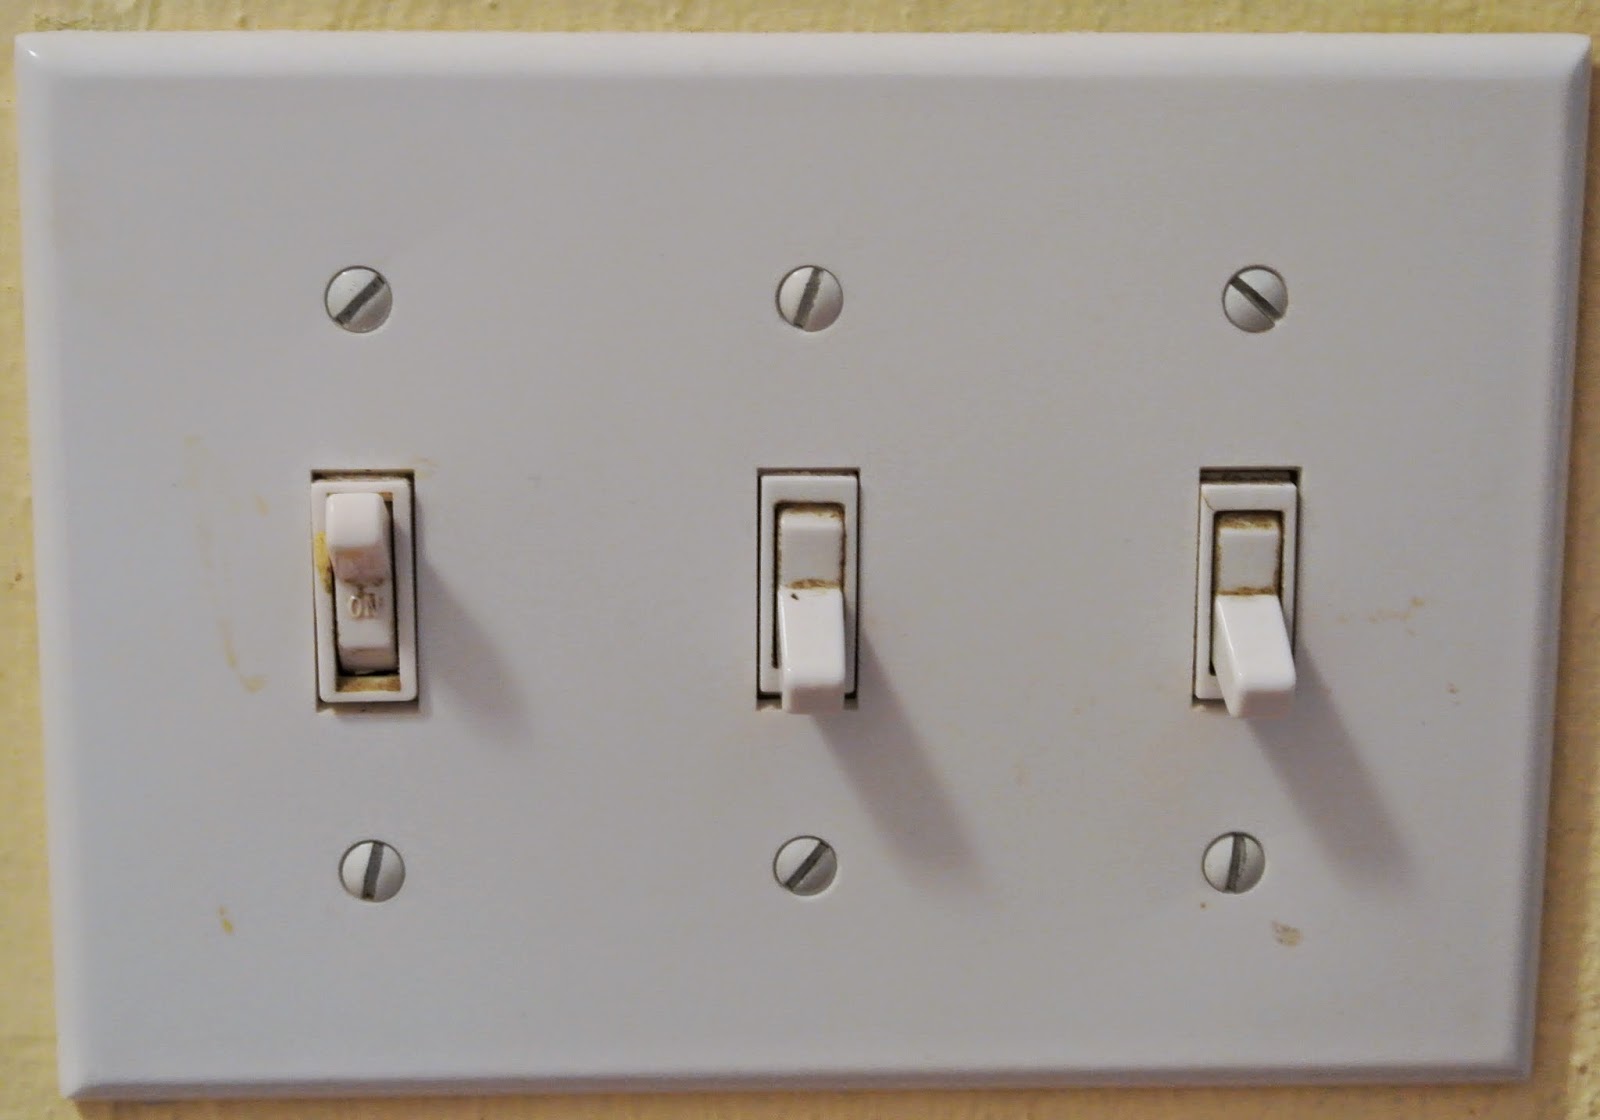
Here is one such panel, probably the most heavily-used because it's in a central hallway:


Ew.  Look at all that grime in there!  To start, go to your circuit breaker panel and turn off the power to the switch you're working on.  I learned this the hard way by getting a little jolt once while cleaning behind the panel.  It didn't really hurt, but it was terrifyingly scary, so don't let it happen to you!

Once the power is off, take the screws off and wipe the plate down with your favorite general cleaning product (here's mine: Method All Purpose Natural Surface Cleaner, Lavender, 28 Ounce).

Then clean the switches themselves: use a q-tip and your cleaning spray to get as much of the surface dirt off as possible.  To get into the little nooks and crannies, use something kind of sharp - I used some pointy tweezers (note: majorly disinfect after you're done...ewww....) covered with paper towels to get in there.  A teeny screwdriver, a toothpick, a fat needle - these would probably all work.  You'll be grossed out by the grossness you remove.

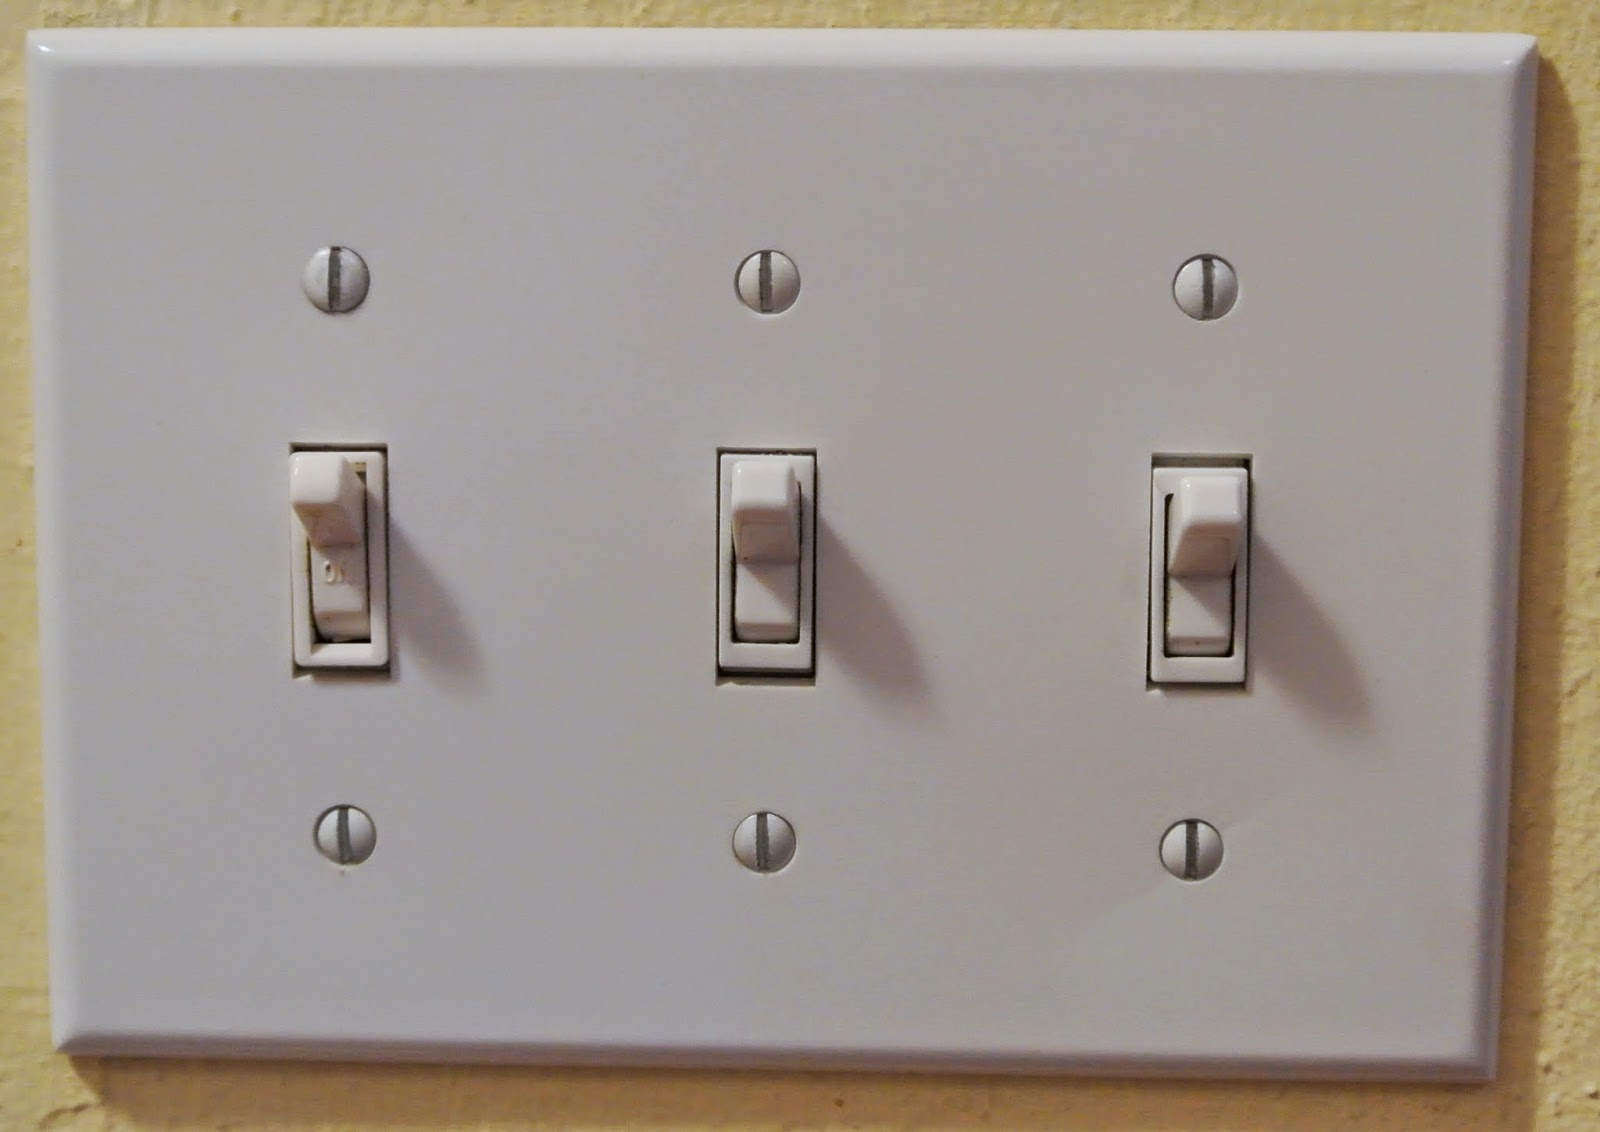
Put everything back and you'll be amazed by how much better it looks!  Especially if you line up all the screw slots in the same direction :)


Some of my other switches needed more of a facelift.  This one, for instance:


I gave the screws a coat of white spray paint in my magic spray paint box of wonderment (a.k.a. random cardboard box in garage):


(One day, in the far, far away future, I may be able to finally write a post that doesn't involve spray paint.) Notice the switch on the left is an almond-y color and doesn't match. I figured painting it would be much easier/free-er than replacing the switch with a brand new one, but you could do that too if you know your electrical wiring stuff.  Which I don't.
After the whole cleaning thing, tape everything off with newspaper with a hole cut out of it:


And give it a light coat of spray paint. It only took maybe about 10 minutes for it to dry enough to flip the switch and paint the other side, then maybe a couple hours to dry completely before reassembling:


Swoon!!

I did the same for a couple slider-type light switches, some power sockets, phone jack sockets, etc.  Just remember to be safe and turn off the power to the right things.

Omg. What I thought would be a really quick post turned out to be major.  I'm gonna go work on being a little less OCD now...

Follow

Saturday, March 7, 2015

Swatch book

Follow my blog with Bloglovin: woohoo! Finally got around to setting up my bloglovin account!

Follow
Hi all!  Here's to a happy daylight savings springing forward tomorrow!  It'll be so nice for sunset to be an hour later in; the dogs might start getting real evening walks again.

In preparation for our move later this year, I wanted to curate all the paint colors and fabrics I've collected over the years in our current house.  Because let's face it - some of those paint colors were very hard to come by (it's so hard to find the paint color that matches the vision in your head!), and I might want to use some of them again at our next place.  Plus I think it'll be a nice portable reference when I shop.

First, acquiring the paint swatches. I find that the little paint chips at the hardware store are just too tiny to be helpful, so I made my own.  I cut out a generous size piece of cardboard (I think around 4x4" was ideal, but no need to actually measure) and painted it.

Here are the highly technically advanced and complicated steps to gathering a swatch book:

1. Treasure hunt at home (or at the store) for 3 ring binder.  I have a dangerous obsession with my label maker so of course I had to use it on my binder:


2. Get a bunch of plastic sheet protectors - I found these to be the best deal on Amazon: C-Line Top Loading Standard Weight Poly Sheet Protectors, Non-Glare, 8.5 x 11 Inches, 50 per Box.

3. On plain white sheets of paper, tape your swatches. Double-sided tape if you've got it.  Label with as much detail as you can: brand, color, what store you got it from, etc.  You can organize the pages by room, or whatever makes sense to you.


4. Step back and admire how organized you are!


Whew! After all that hard work you just might find yourself tuckered out...

Wednesday, December 3, 2014

Cheap work-around for rugs that slip (and frames that won't sit straight on your walls!)

Just a quick little tip today because it's been too long, and no pictures because my legs are just too tired to get my bum off the couch!


So you'd never guess that the following horrendous scenarios could be solved by the same doohickey:

1. You buy a new area rug, and realize the bottom doesn't come with a non-skid coating.  And every time you step on it, it slips a little bit.  Now you're going to have to shell out for a pricey area rug mat, which can run well over $20...

2. You hang a picture frame on the wall, and the darn thing just won't stay straight!  The OCD in you is going mad from the disorder...

What to do?? Solution: glue dots!  I originally picked these up at Home Depot, but I guess they don't carry them anymore, so that points to the Amazon link instead.  Make sure you get the removable kind so you don't damage your floors and walls.  Put as many as you need on the corners and/or sides of your rugs and/or frames.

I do like the permanent non-removable version, though, for some craft projects - they hold a lot stronger than double-sided tape does.

I've got a lot of other ideas brewing up here for upcoming posts: DIY placemats, bedskirts, and some trash-to-treasure projects.  Maybe I'll get some of those checked off while hubby is traveling next week.  If you haven't already, please subscribe and keep up with it all!

Hope you had a wonderful Thanksgiving, everyone!  Here's proof that Casper and his golden buddies sure did - and so did the humans.  The wine in the background helped.


Sunday, July 6, 2014

Wine cork trivet

Happy belated 4th of July, everyone! It's been quite a while since my last post, and I was inspired by my friend Jayodita's recently born blog and very adorable Playful PaletTe to keep at this!


Ok so at some point or another we've all taken this solemn oath:

Only to then realize that it's a lot easier to just do this:

So in case you want to fool people into thinking you're not that lazy, here's a pretty quick way to use up 37 of those wine corks into a cute fat lil' trivet*:

*This craft activity best enjoyed while drinking wine**.
**May cause intoxication.

First, stand them all up and trim the end that will go on the bottom so they stand up nice and straight.  You should also trim any that are abnormally taller than the rest.  Cutting board and sharp kitchen knife work just fine for this.


Then, line up all your rows that form the hexagonal-shaped trivet: 4, 5, 6, 7, 6, 5, and finally 4.  I opted for an ombre pattern here, but get creative with the pattern (random or otherwise) that you choose.  Also keep in mind that you want corks with pretty or interesting labels to go on the perimeter, so you can see it after this thing is assembled.


Time to start gluing like a crazy person!  Put your middle row of 7 together first, along a straight edge such as the pictured random notebook I pulled from a pile of conference junk.  I used Gorilla Wood Glue between each pair of corks, which worked out well because the color blends in with the corks, and it bonds really well.  It also turns tacky pretty quickly, which makes the job easier.  Make sure you put some newspaper down to protect your work surface.


Continue building up the rest of the rows, packing each cork with a nice dab of glue closely between its neighbors, and ta-da! Trivet done.  (Please appreciate that I'm trying really hard to not make any nerdy materials science references right now.)  You could also go crazy and make these bigger or smaller, or cut the corks in half for a lower-profile trivet - or coasters!)

Optional: I bordered the whole thing with a scrap of ribbon, also with some light touches of the wood glue and a temporary piece of scotch tape to hold the end down while the glue dried..  Tuck the ribbon in between the corks for a clean look.


Finally, we can't do a blog post without a puppy pic, so I present the following of our sweet Elba for your cuteness enjoyment.  (My friend Christine accused me this weekend of only ever wanting to talk about puppies and kittens.  Guilty as charged?)


Sunday, March 9, 2014

Replacing coat pockets: your favorite pockets, guaranteed!

Thankfully, since hubby and I have been living in California for the past 5 or so years, we haven't had to deal with frigid winters - thank goodness!  But whether you're dealing with the polar vortex or just some foggy mornings in northern CA, there's nothing better than a toasty pocket.

I first did this with a winter coat when we lived in Boston.  For some reason, even nice heavy coats often come with a really thin crepe-y polyester lining that not only rips easily at the seams, but isn't very warmHand-sewing them back up is only a temporary fix.

Here's a quick project to permanently fix up thin coat pockets that have holes in them. (It took me about an hour, but am really.easily.distracted.  Especially if there are dogs on tv! And in your lap.)

For your replacement lining material, pick a fabric that is both durable and feels good against your hands. If you have a more fitted coat, pick a thinner fabric so you don't get bulky pockets that mess up your look.  For a coat that's heavy, you can go for thick fleece or even faux fur, and you will not ever want to take your hands out of your pockets. The one thing you don't need to worry about is how the material looks, because it will be hidden from view!  (That also means you can pretty much be as messy as you want to be with the stitches - lazy or inexperienced sewers rejoice.)

Here is the wool coat that will be my victim today, with its torn pocket innards displayed in dramatic fashion:

First, with a seam ripper or sharp scissors, separate the lining from the outer fabric at the front bottom corner under the pocket:
 You just need a slit wide enough so you can access the pocket and pull it out from the bottom.  Then, go to town and start ripping the seams that hold the pocket to the edge of the outer coat material...

...on both sides of the pocket. If you're going to be replacing both pockets, only take apart one at a time so you can use the other for reference in case you get lost in putting things back together.

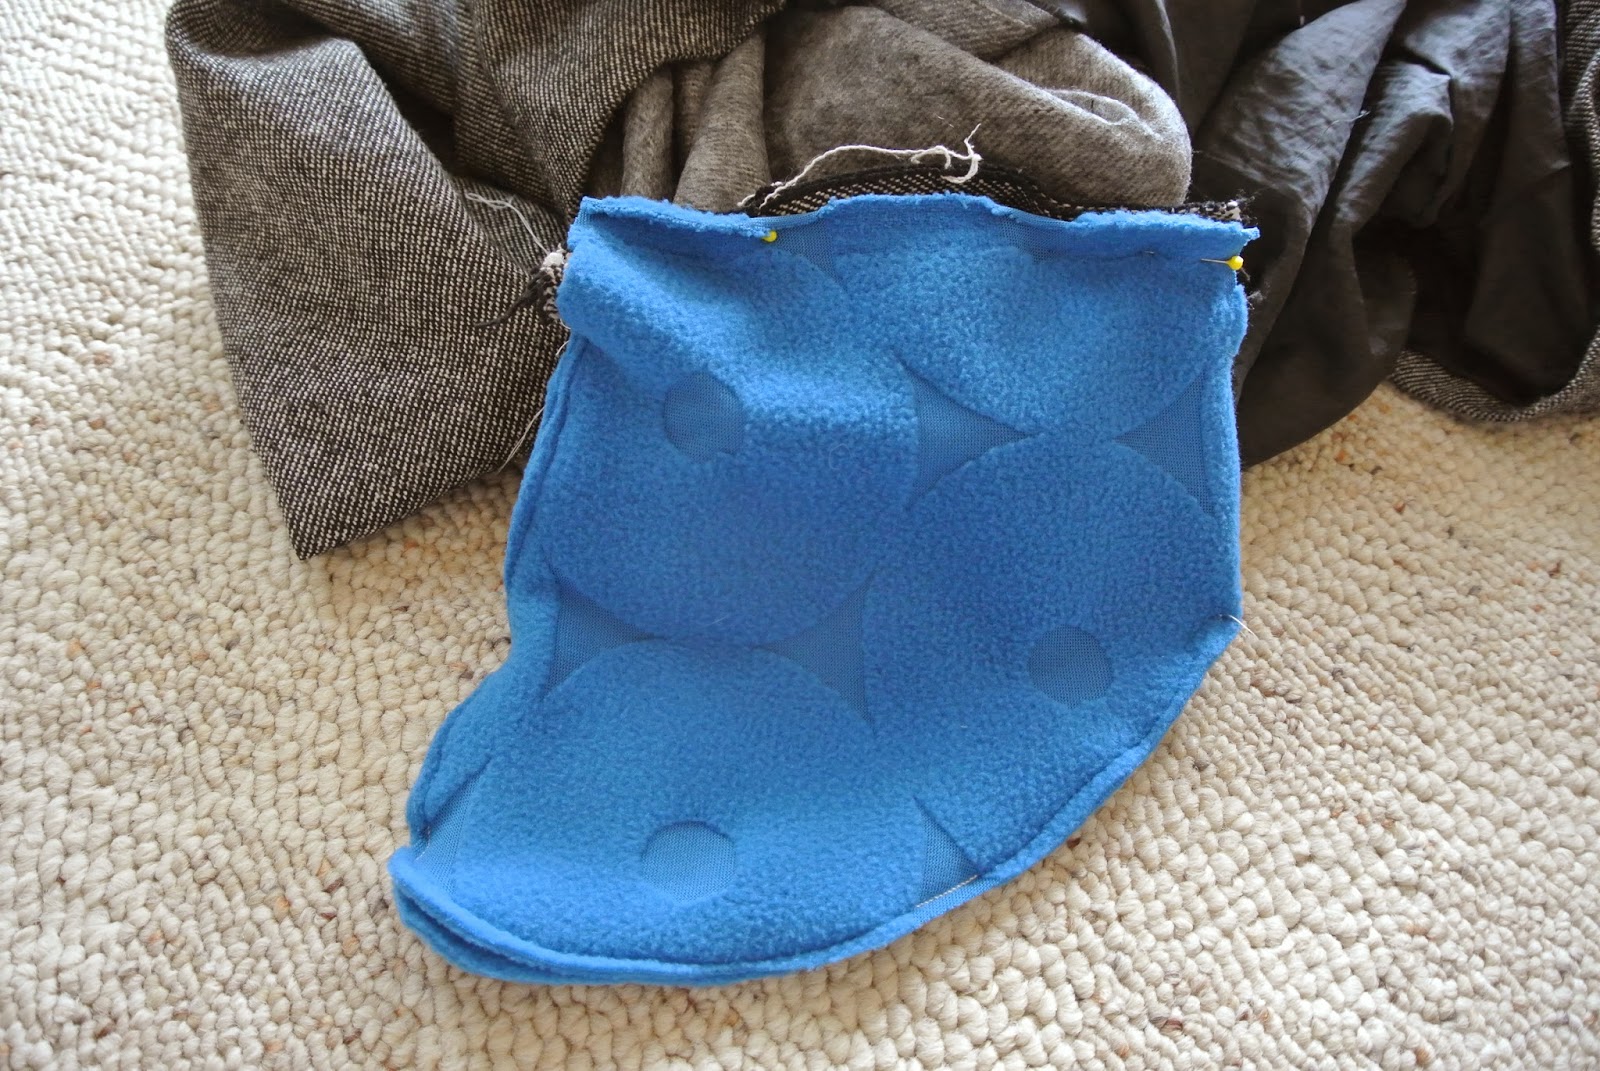
So, now that you have your old pocket freed, you can use it as a pattern for your new pocket!  For this coat I used a thin fleece fabric. (Please don't tell anyone it's from Ikea's fabric aisle, but I happened to already be there and it saved me from a trip to the fabric store.)
 You can cut the two sides of the pocket separately, or just fold the fabric over like I did so you're spared from a tiny bit of sewing.  And, you can make your new pockets deep so you can store even more crap in them!


Ok so now pocket transplant part 2: match the new pocket edges back up to the coat, and pin it in place.  Make sure that everything lies flat, so you don't get that bulkiness I mentioned earlier.  Carefully (so you don't pin yourself like I always manage to do) tuck the pocket back into the coat before you sew everything up just to make sure it falls into place. When you're satisfied, pull the pocket back out from the bottom of the coat and sew up everything you pinned.
I used my sewing machine to zip through sewing the edges, and then finished up the tight corners with hand sewing.

And there you go! With your new toasty pockets hopefully you're gonna face the chill feeling like this:


Sunday, February 23, 2014

Pouring bleach without a mess

It's been a few weeks since my first "welcome" post, and thanks to a conference and a crazy lab schedule, this little project has been sitting on the back burner!

Just so I can feel a little accomplished on Sunday in which I had planned to do everything but did almost nothing, here's a little tip for those of you who do laundry.  Hopefully, that's...everybody?  I like washing our cotton whites with bleach - there's nothing like it to get things looking like new again - but don't like the risk of dripping bleach over the floor and little pups that might be running around.  Plus I already have way too many bleach-stained shirts and shoes from working in a research lab.

Solution: we had some unused coffee stirrers from eons ago, and now I keep one handy in the laundry room so I can do this:


Ok obviously one hand was holding the camera, but in real life you'd hold that coffee stirrer with your other hand, touch the edge of the bleach bottle on the side of the stirrer, and the end of the stirrer at the bleach compartment.  Zero drips. You could do this with anything - a popsicle stick, old chopstick, etc.  For storage, keep it in a paper cup or something like that so you don't get bleach on unintended surfaces.

I actually learned this from my dad because he wanted to be able to pour copious amounts of soup without having it run down the edge of the pot.  For serious.  Yes, a ladle probably would have worked better, but nevermind that - the point is you can do it to pour any liquid without making a big mess!

And, a shot of our remodeled laundry room! More on that remodel later, since plumbing and electricity needs some sort of...pretty cover-type-thing.  (Very specific, I know.)


And finally, a bonus! Here's a little trick right off the pages of Pinterest: a pair of coat hooks as a cheap and pretty ironing board hanger.  Apparently I've also taken the liberty of using it as a hamper hook :P


Have a great work week, everyone!