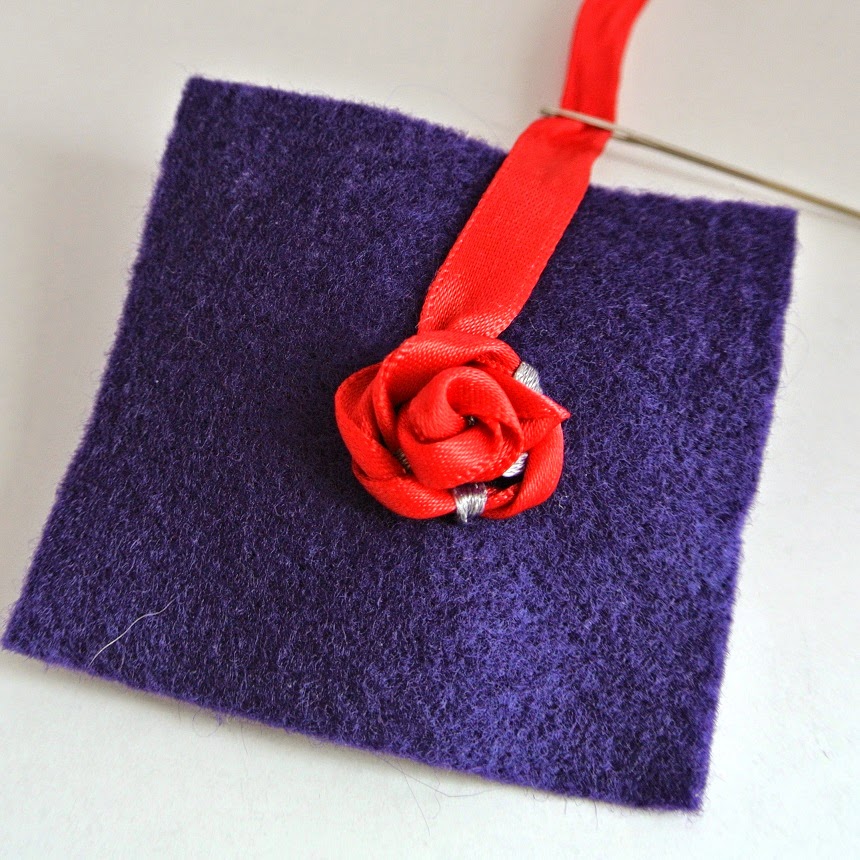
So here's my tutorial for making tiny ribbon roses, which I need for a little project I'll share in a later post. I sought high and low online and didn't quite find what I wanted, so I kind of cobbled a hybrid from tutorials from Ravings of a Mad Crafter and Solo Un Tip. (Just giving credit where it's due.) Enjoy!
Materials
- 1/8" wide ribbon ("skinny")
- 3/8" wide ribbon ("wide")
- 2 needles with eyes big enough to easily put the ribbons through. That was no problem for me, since I just ordered a lifetime supply of sewing needles from Amazon.
- thread
- cloth onto which you will build the rose: I found felt to be a great material, but you can also use organza, or a bulky fabric that is easy to make large holes in.
Part 1: Make the star-shaped frame
1. Cut a 10" piece of each width of ribbon, at an angle so it'll be easier to... 2. Thread each ribbon through a needle. 3. Pull the thin ribbon through the fabric:
4. On the back side, tie a simple knot so it stays put:
5. Flip the fabric over. Sew the ribbon back to the other side by making what will be the center of the rose, so that you have a stitch that is roughly 1/2" long. It will look like this; you are looking at the front side of the fabric where the rose will end up:
6. Use something like a ballpoint pen or dull pencil to make the center hole bigger:
7. Continue sewing the ribbon in and out until you form a 5-sided star. Each arm of the star should come out of that center hole. I found it best to go in this order (you're looking at the front here):
8. When you're done forming the last arm of the star, you can sew or glue down the end of the ribbon on the back side of the fabric:
Part 2: Form the rose
9. Insert the wider ribbon through the center hole of the frame until it peeks through. If you're having trouble, you can use a needle to pull it through:10. Pull it all the way through. On the back side, make another knot to keep it in place:
11. Now the fun part! Twist the needle around several times:
12. Wind the part of the ribbon that is coming out of the frame into a tight little circle, and you'll find that the ribbon forms a nice little rose center all by itself:
13. Making sure the center stays put, take the needle under one of the arms in the frame and pull it all the way through:
14. Continue building the rose by making 1 or 2 twists in the ribbon, and pinning it down to an arm of the star. Skip everyone other arm as you go around so that the "petals" are big enough.
15. After about twice around, it'll look something like this:
Then this:
17. Trim your ribbon and step back to admire your work!
You can see the frame ribbon is already pretty well hidden here, but it looks great with matching colors:
I haven't tried it yet, but I'm sure this wouldn't be too hard to scale up using wider ribbon to make larger roses.
So I wrote most of this during our long flights when we took a trip to Boston this past weekend for a wedding, while our brother- and sister-in-law (bless them!) watched the little monsters. They couldn't be happier, especially because it means they had their big fluffy monster friend Blue to play with all weekend! Hope you all enjoyed your weekend as well...the next one isn't too far away now!!
Follow


No comments:
Post a Comment