Monday, March 30, 2015

Spring cleaning: light switches!


Happy Monday, guys!  (If there is such a thing...)

I got some great spring cleaning done this weekend, including cleaning up some light switches! If you live in an older home like me, these are some of the little details that get easily overlooked, but can really brighten up your house if you deal with them.

Here is one such panel, probably the most heavily-used because it's in a central hallway:
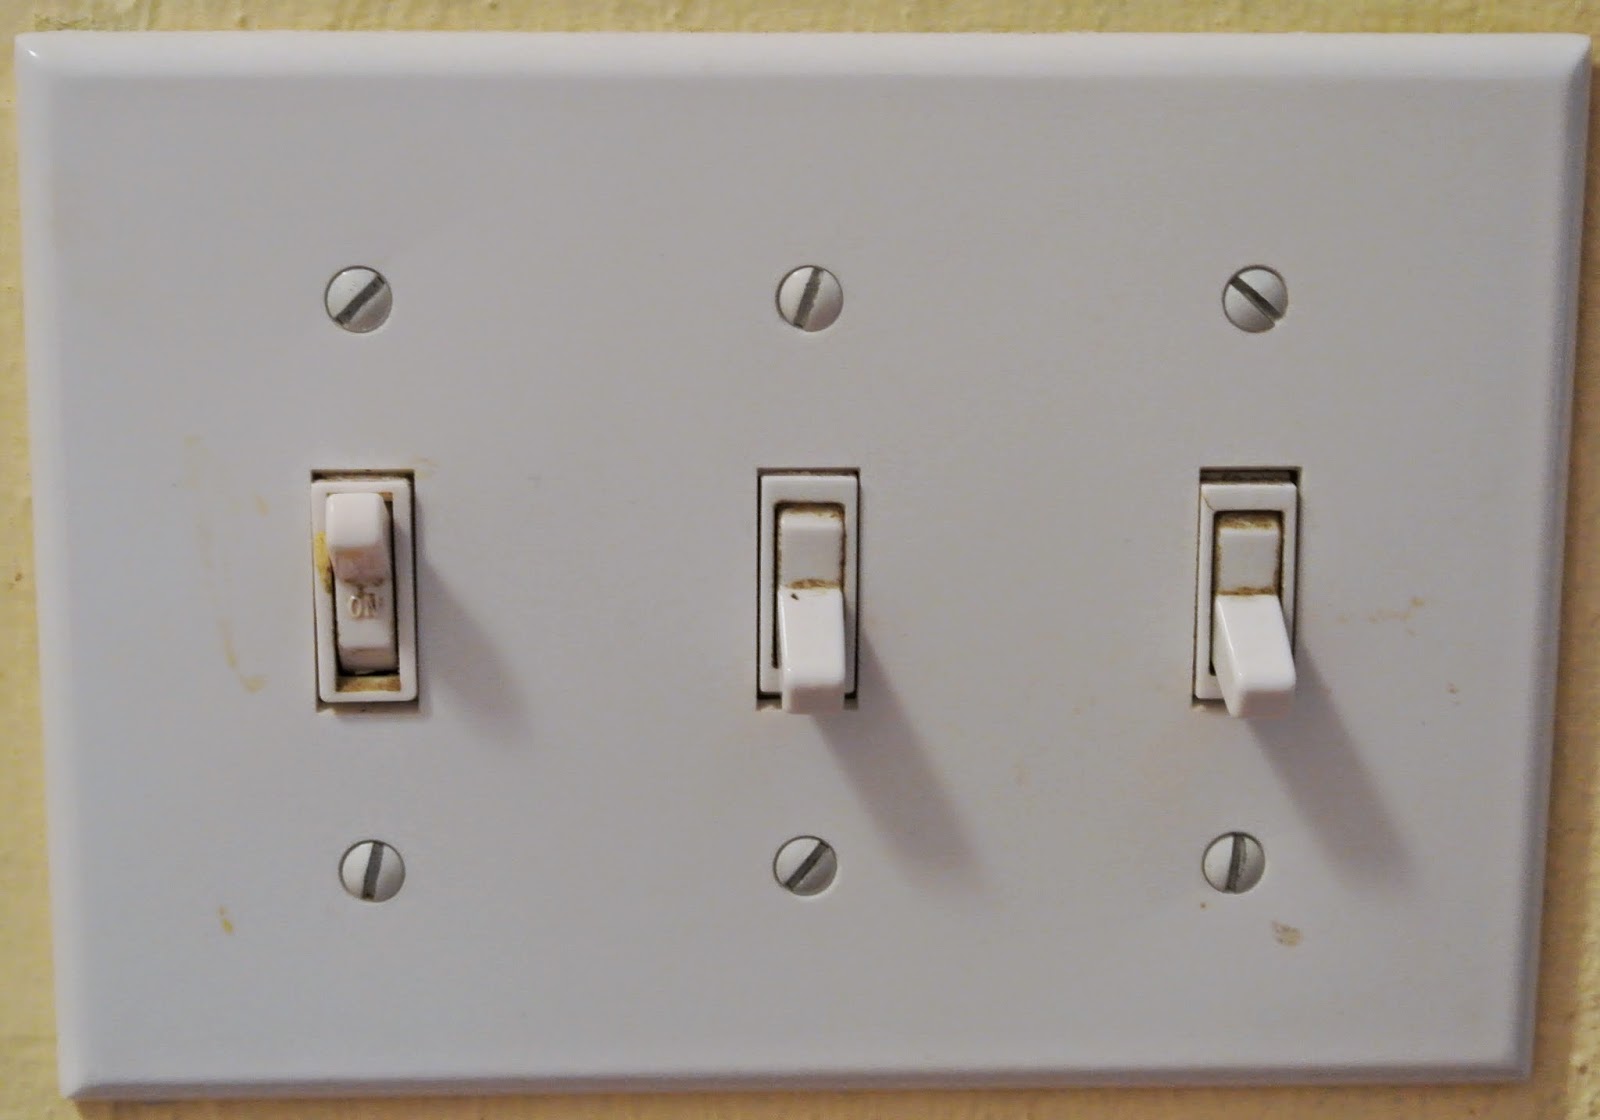

Ew.  Look at all that grime in there!  To start, go to your circuit breaker panel and turn off the power to the switch you're working on.  I learned this the hard way by getting a little jolt once while cleaning behind the panel.  It didn't really hurt, but it was terrifyingly scary, so don't let it happen to you!

Once the power is off, take the screws off and wipe the plate down with your favorite general cleaning product (here's mine: Method All Purpose Natural Surface Cleaner, Lavender, 28 Ounce).

Then clean the switches themselves: use a q-tip and your cleaning spray to get as much of the surface dirt off as possible.  To get into the little nooks and crannies, use something kind of sharp - I used some pointy tweezers (note: majorly disinfect after you're done...ewww....) covered with paper towels to get in there.  A teeny screwdriver, a toothpick, a fat needle - these would probably all work.  You'll be grossed out by the grossness you remove.

Put everything back and you'll be amazed by how much better it looks!  Especially if you line up all the screw slots in the same direction :)
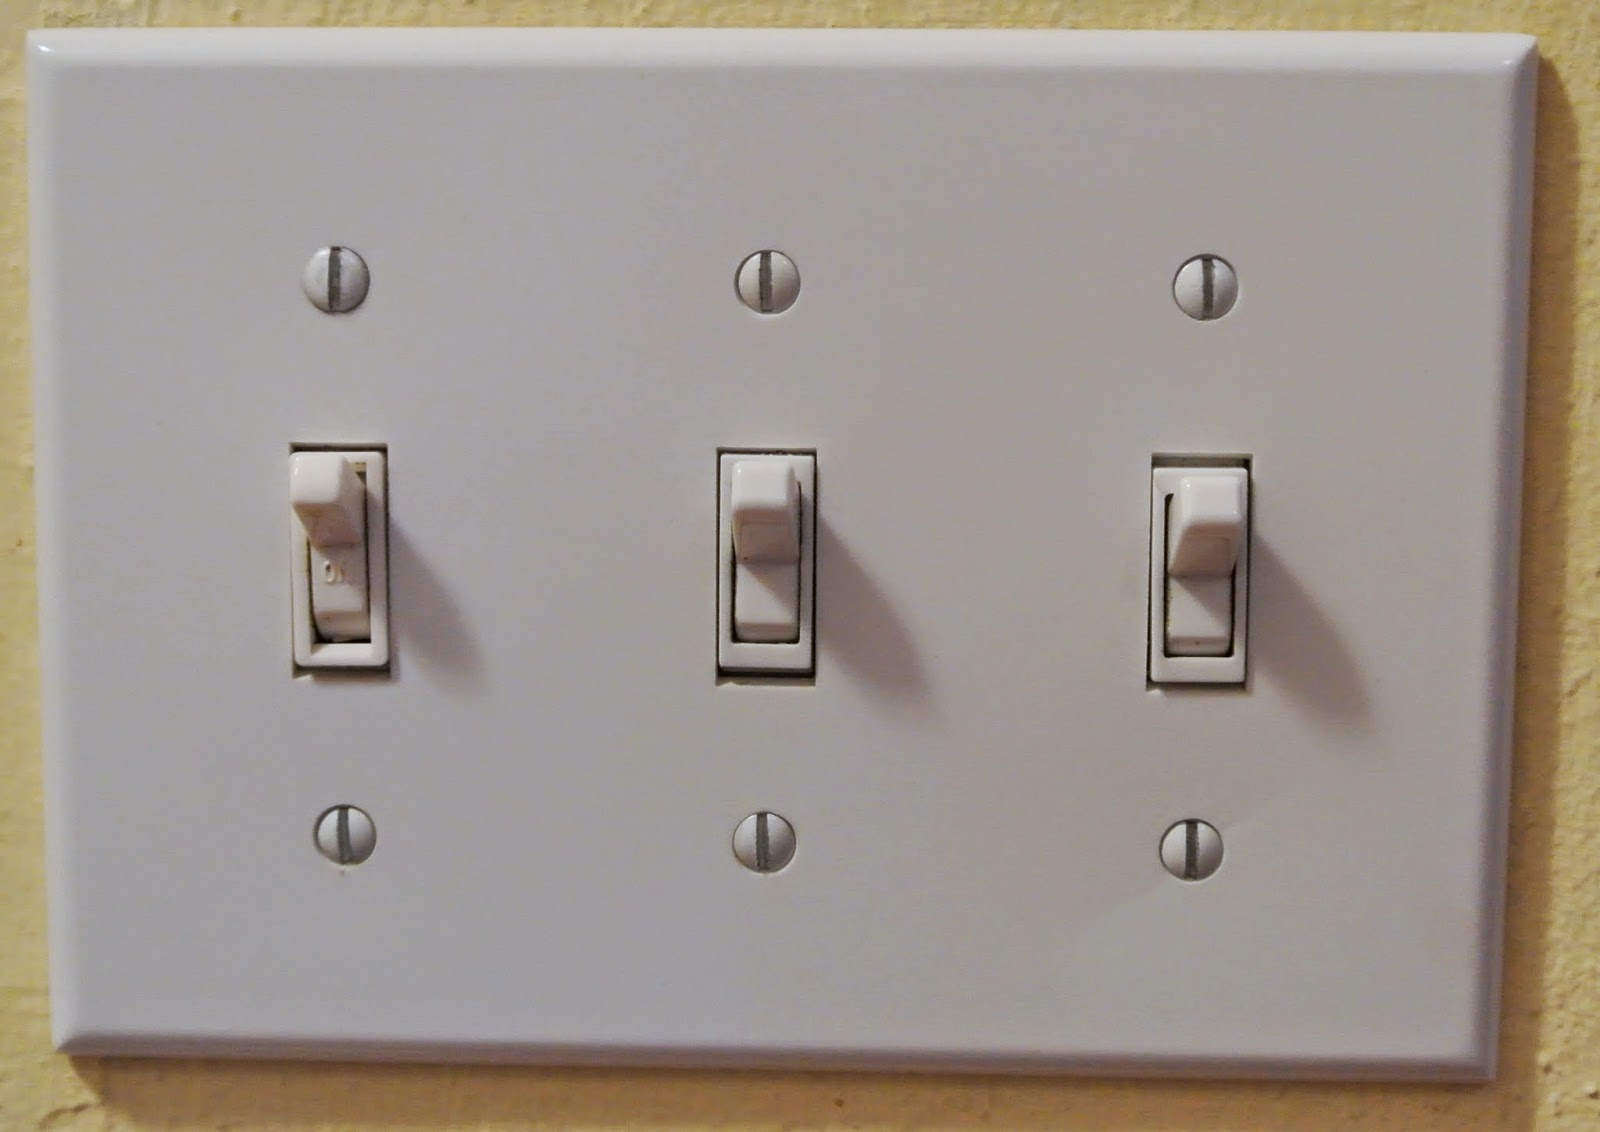

Some of my other switches needed more of a facelift.  This one, for instance:


I gave the screws a coat of white spray paint in my magic spray paint box of wonderment (a.k.a. random cardboard box in garage):


(One day, in the far, far away future, I may be able to finally write a post that doesn't involve spray paint.) Notice the switch on the left is an almond-y color and doesn't match. I figured painting it would be much easier/free-er than replacing the switch with a brand new one, but you could do that too if you know your electrical wiring stuff.  Which I don't.
After the whole cleaning thing, tape everything off with newspaper with a hole cut out of it:


And give it a light coat of spray paint. It only took maybe about 10 minutes for it to dry enough to flip the switch and paint the other side, then maybe a couple hours to dry completely before reassembling:


Swoon!!

I did the same for a couple slider-type light switches, some power sockets, phone jack sockets, etc.  Just remember to be safe and turn off the power to the right things.

Omg. What I thought would be a really quick post turned out to be major.  I'm gonna go work on being a little less OCD now...

Follow

Saturday, March 28, 2015

Side table makeover

The previous owners of our house left a few pieces of furniture behind, including this sad little unfinished wood table outside on a covered deck.  I thought about tossing it, but it spoke to me.  "Make me pretty; paint me", it said.  So I tried.

The first time around, I went a little crazy.  The stark white paint I picked wasn't really working anywhere, and I had stenciled this crazy fleur de lis pattern that ended up being a bit off center.


Lived with all that for a couple years, but decided it was time for a change!

I used drywall spackle to fill up some of the cracks, and gave it a couple of coats of Behr's Grant Gray in satin finish (left over from another project I have yet to write about).  But, it still needed a little something.  Solution: spray paint, of course!  (I could seriously rename this blog "How to use spray paint in every conceivable situation".)

Masked off the top surface with newspaper and painter's tape, and used the same silver spray paint from other projects to highlight just the edges of the table top.


I'm so in love with the final effect!  The silver looks nicely subtle against the gray.


I will leave you with some pictorial evidence of its final location in our bedroom, where cuteness has been used as a decoy to distract you from the dog hair all over that chair. (Oops, did I type that out loud...)


If you'll allow me to be insane for a quick second, I'm going to caption these silly monsters.  Casper is saying, "Um. What are you doing." Elba is saying, "Hi, I'm cute. Do you wanna see my teeth?"


Have a great weekend, everyone!

Follow

Monday, March 23, 2015

Kale salad recipe

I'm hoping this blog will help me keep track of go-to recipes, since I often use one, love it, and then forget about it. Fast forward a few weeks later, and I'm totally at a loss about what to cook for a nice dinner!

Tonight I made this kale salad recipe from Marin Mama Cooks. Just a few slight modifications, though - I didn't have Parmesan cheese so just used the pepper jack on hand. I also cooked the garlic a little bit in the oil and pan left over from another dish, to make sure it wasn't too strong.  And finally, didn't have enough lemon juice so subbed in some white vinegar.  But the finished product was SO good:


Am I weird if I'm super looking forward to the next time I make kale? Will definitely be my go-to kale salad, and love that I can pack it in my lunch tomorrow (as opposed to lettuce salads that won't hold up.) I can see this seasoned so many different ways, too.

Happy Monday, everyone! It's spring break on the Berkeley campus so us grad students have the run of the place :)

Follow

Sunday, March 22, 2015

Champagne cage chairs

Hi.  I have a problem.  I keep everything.  Sometimes it's basically trash.


But.
Here's a rare case I'm glad I'm borderline hoarder!  I've been collecting champagne wire cages (you know...the little metal thingy holding the champagne cork in place) for a looong time, and we drink a lot of champagne, as evidenced by my wine cork napkin holder bordered by champagne corks.  I finally found a cute use for them!  I basically followed these simple instructions from about.com.

Then I played around with different chair backs, and finished off the chairs with a coat of my trusty silver spray paint for a uniform look:


They're pretty adorable lined up in a row on a shelf.  I think ultimately, these would be great keepsakes for special occasions...I'd just need some oil pens so I can write the occasion and date.  Anyone out there have any recommendations for good oil pens?

Can't believe this week is already over - hope everyone got to do some lounging this weekend like Elba did!
Follow

Saturday, March 7, 2015

Swatch book

Follow my blog with Bloglovin: woohoo! Finally got around to setting up my bloglovin account!

Follow
Hi all!  Here's to a happy daylight savings springing forward tomorrow!  It'll be so nice for sunset to be an hour later in; the dogs might start getting real evening walks again.

In preparation for our move later this year, I wanted to curate all the paint colors and fabrics I've collected over the years in our current house.  Because let's face it - some of those paint colors were very hard to come by (it's so hard to find the paint color that matches the vision in your head!), and I might want to use some of them again at our next place.  Plus I think it'll be a nice portable reference when I shop.

First, acquiring the paint swatches. I find that the little paint chips at the hardware store are just too tiny to be helpful, so I made my own.  I cut out a generous size piece of cardboard (I think around 4x4" was ideal, but no need to actually measure) and painted it.

Here are the highly technically advanced and complicated steps to gathering a swatch book:

1. Treasure hunt at home (or at the store) for 3 ring binder.  I have a dangerous obsession with my label maker so of course I had to use it on my binder:


2. Get a bunch of plastic sheet protectors - I found these to be the best deal on Amazon: C-Line Top Loading Standard Weight Poly Sheet Protectors, Non-Glare, 8.5 x 11 Inches, 50 per Box.

3. On plain white sheets of paper, tape your swatches. Double-sided tape if you've got it.  Label with as much detail as you can: brand, color, what store you got it from, etc.  You can organize the pages by room, or whatever makes sense to you.


4. Step back and admire how organized you are!


Whew! After all that hard work you just might find yourself tuckered out...

Sunday, March 1, 2015

Decoupage notebooks

Happy weekend, everyone! It's been such a quiet and relaxing weekend - and my evil cold illness of zombieness is finally going away! Wish today would go on forever...and can you believe it's already March?!

In preparation for a move later this year, I'm trying to get rid of as much junk and clutter as I can long before I even have to think about packing.  I had a few random notebooks lying around, but with covers that made them practically unusable - they either needed a makeover, or a home in the recycling bin.  This included some composition books bought on clearance to qualify for a minimum online purchase to get free shipping (so random, I know), which I had planned on recovering them but never got around to it.  I also had a panda-cover notebook was an impulse buy, but I realized that I can't use it in any serious situation without looking like a 4 year old!  Some Lisa Frank unicorn stickers and I'd be all set.

This is what I used to bring new life to these notebooks: Mod Podge Original 16-Ounce Glue, Gloss Finish.  To refresh my memory on the decoupage process, I checked out this post from A Diamond in the Stuff.

Here's the finished products!


Follow

Saturday, February 21, 2015

Mason jar soap dispenser DIY

Ugh. The common cold is a cruel invention of nature.

To ease some of the pain associated with the awful cold I came down with this week, I had to solve something around the house!  Our fancy high-tech sensor hand soap dispenser in the kitchen broke down the other day, so it needed a replacement.  Now, I don't think I've emphasized this enough, but I'm a HUGE fan of trash-to-treasure/upcycling/call it what you will. (a.k.a I'm cheap and too lazy to go to the store.)  So I wanted to try to pull this off using only stuff I already had at home.

First, the jar.  That was easy: dug this little gem out of our recycling bin.  Note "Classico" pasta sauce actually has a pretty nifty mason jar behind the label, which came off pretty easily with the scrape of a razor blade and some Goo Gone. The expiration date printing comes right off with acetone nail polish remover.  And, it's nice not to jump on the Ball mason jar bandwagon like everyone and their mother ;)


Next, the pump.  I have a stash of identical shampoos and conditioners (...thanks, Costco...), so just took the pump from one of them.


Punching a hole in the lid big enough to fit the base of the pump was the hard part, and I almost caved here and bought a 3/4" drill bit.  Crisis averted: I ended up using the biggest drill bit I had to start the hole, then a Dremel with cutting attachment to cut slits, and pliers to peel them up to make the hole bigger:


Then sealed the pump into the lid using a hot glue gun:


Thankfully, trimming the pump tube to fit the jar was a lot easier...just good ol' scissors.


Wrapped up the stem with newspaper, and sprayed the top with spray paint.  (Had some leftover from when I painted heating vent floor registers to match our carpet.)


Now the best for last!  Faux mercury glass.  Pretty much followed this nice tutorial from Vintage Fragment to a tee.  Just did 2 layers, and really happy with the results.


So here we are!  Yes, I realize the side-by-side comparison doesn't quite make sense because the jars are different sizes, but I'm sick, ok?!  Cut me some slack.


Having a functioning soap dispenser in our kitchen is SO great...maybe it'll keep the hubby from catching my cold.  Wouldn't that be nice, Elba?


(She says yes.) Hope everyone reading stays healthy!